
고양이 사진첩 만들기
요구사항
- 고양이 사진 API를 통해 사진과 폴더를 렌더링
- 폴더를 클릭하면 내부 폴더의 사진과 폴더를 보여줌
- 현재 경로가 어디인지도 렌더링
- 루트 경로가 아닌 경우, 파일 목록 맨 앞에 뒤로가기를 넣음
- 사진을 클릭하면 고양이 사진을 모달창으로 보여줌
- esc를 누르거나 사진 밖을 클릭하면 모달을 닫음
- API를 불러오는 중인 경우 로딩 중임을 알리는 처리
더보기
<!DOCTYPE html>
<html lang="en">
  <head>
    <meta charset="UTF-8" />
    <meta http-equiv="X-UA-Compatible" content="IE=edge" />
    <meta name="viewport" content="width=device-width, initial-scale=1.0" />
    <title>고양이 사진첩</title>
    <link rel="stylesheet" href="https://cdn.roto.codes/css/cat-photos.css" />
  </head>
  <body>
    <main class="App"></main>
    <script src="/src/main.js" type="module"></script>
  </body>
</html>
더보기
import App from "./App.js";

const $target = document.querySelector(".App");

new App({ $target });
더보기
const API_END_POINT = "...";

export const request = async (url) => {
  try {
    const res = await fetch(`${API_END_POINT}${url}`);

    if (!res.ok) {
      throw new Error("API Call Fail");
    }

    return await res.json();
  } catch (e) {
    alert(e.message);
  }
};
더보기
import { request } from "./api.js";
import Breadcrumb from "./Breadcrumb.js";
import ImageViewer from "./ImageViewer.js";
import Loading from "./Loading.js";
import Nodes from "./Nodes.js";

export default function App({ $target }) {
  this.state = {
    isRoot: true,
    isLoading: false,
    nodes: [],
    paths: [],
  };

  const loading = new Loading({
    $target,
  });

  const breadcrumb = new Breadcrumb({
    $target,
    initialState: this.state.paths,
    onClick: async (id) => {
      // 클릭한 경로 외에 paths를 날림
      if (id) {
        const nextPaths = id ? [...this.state.paths] : [];
        const pathIndex = nextPaths.findIndex((path) => path.id === id);

        this.setState({
          ...this.state,
          paths: nextPaths.slice(0, pathIndex + 1),
        });
      } else {
        this.setState({
          ...this.state,
          paths: [],
        });
      }

      await fetchNodes(id);
    },
  });

  const nodes = new Nodes({
    $target,
    initialState: {
      isRoot: this.state.isRoot,
      nodes: this.state.nodes,
      selectedImageUrl: null,
    },
    onClick: async (node) => {
      if (node.type === "DIRECTORY") {
        await fetchNodes(node.id);
        this.setState({
          ...this.state,
          paths: [...this.state.paths, node],
        });
      }

      if (node.type === "FILE") {
        this.setState({
          ...this.state,
          selectedImageUrl: `https://kdt-frontend.cat-api.programmers.co.kr/static${node.filePath}`,
        });
      }
    },
    onPrevClick: async () => {
      const nextPaths = [...this.state.paths];
      nextPaths.pop();
      this.setState({
        ...this.state,
        paths: nextPaths,
      });

      if (nextPaths.length === 0) {
        await fetchNodes();
      } else {
        await fetchNodes(nextPaths[nextPaths.length - 1].id);
      }
    },
  });

  const imageViewer = new ImageViewer({
    $target,
    onClose: () => {
      this.setState({
        ...this.state,
        selectedImageUrl: null,
      });
    },
  });

  this.setState = (nextState) => {
    this.state = nextState;

    nodes.setState({
      isRoot: this.state.isRoot,
      nodes: this.state.nodes,
    });

    imageViewer.setState({
      selectedImageUrl: this.state.selectedImageUrl,
    });

    loading.setState(this.state.isLoading);

    breadcrumb.setState(this.state.paths);
  };

  const fetchNodes = async (id) => {
    this.setState({
      ...this.state,
      isLoading: true,
    });
    const nodes = await request(id ? `/${id}` : "/");

    this.setState({
      ...this.state,
      nodes,
      isRoot: id ? false : true,
      isLoading: false,
    });
  };

  fetchNodes();
}
더보기
export default function Nodes({ $target, initialState, onClick, onPrevClick }) {
  const $nodes = document.createElement("div");
  $nodes.classList.add("nodes");
  $target.appendChild($nodes);

  this.state = initialState;

  this.setState = (nextState) => {
    this.state = nextState;
    this.render();
  };

  this.render = () => {
    // 노드 타입(디렉토리 / 파일)에 따른 렌더링 로직
    const { isRoot, nodes } = this.state;

    $nodes.innerHTML = `
      ${
        isRoot
          ? ""
          : `
        <div class="Node">
          <img src="https://cdn.roto.codes/images/prev.png">
        </div>`
      }
      ${nodes
        .map(
          (node) => `
          <div class="Node" data-id="${node.id}">
            <img src="${
              node.type === "DIRECTORY"
                ? "https://cdn.roto.codes/images/directory.png"
                : "https://cdn.roto.codes/images/file.png"
            }">
            ${node.name}
          </div>
      `
        )
        .join("")}
    `;
  };

  this.render();

  $nodes.addEventListener("click", (e) => {
    const $node = e.target.closest(".Node");

    const { id } = $node.dataset;
    // id가 없는 경우는 뒤로가기를 누른 경우
    if (!id) {
    }

    const node = this.state.nodes.find((node) => node.id === id);
    if (node) {
      onClick(node);
    } else {
      onPrevClick();
    }
  });
}
더보기
export default function ImageViewer({ $target, onClose }) {
  const $imageViewer = document.createElement("div");
  $imageViewer.className = "ImageViewer Modal";
  $target.appendChild($imageViewer);

  this.state = {
    selectedImageUrl: null,
  };

  this.setState = (nextStae) => {
    this.state = nextStae;
    this.render();
  };

  this.render = () => {
    $imageViewer.style.display = this.state.selectedImageUrl ? "block" : "none";

    $imageViewer.innerHTML = `
      <div class="content">
        <img src="${this.state.selectedImageUrl}" />
      </div>
      `;
  };

  this.render();

  window.addEventListener("keyup", (e) => {
    // 만약 누른 키가 esc인 경우 onClose 호출
    if (e.key === "Escape") {
      onClose();
    }
  });

  $imageViewer.addEventListener("click", (e) => {
    if (Array.from(e.target.classList).includes("Modal")) {
      onClose();
    }
  });
}
더보기
export default function Breadcrumb({ $target, initialState, onClick }) {
  const $breadcrumb = document.createElement("nav");
  $breadcrumb.className = "Breadcrumb";
  $target.appendChild($breadcrumb);

  this.state = initialState;

  this.setState = (nextState) => {
    this.state = nextState;
    this.render();
  };

  this.render = () => {
    $breadcrumb.innerHTML = `
      <div class="Breadcrumb__item">Root</div>
      ${this.state.map(({ id, name }) => `
        <div class="Breadcrumb__item" data-id="${id}">${name}</div>
      `).join("")}
    `;
  };

  $breadcrumb.addEventListener("click", (e) => {
    const $breadcrumbItem = e.target.closest(".Breadcrumb__item");

    const { id } = $breadcrumbItem.dataset;
    onClick(id);
  });
}
더보기
export default function Loading({ $target }) {
  const $loading = document.createElement("div");
  $loading.className = "Loading";
  $target.appendChild($loading);

  this.state = false;

  this.setState = (nextState) => {
    this.state = nextState;
    this.render();
  };

  this.render = () => {
    $loading.innerHTML = `
      <div class="content">
        <img width="100%" src="https://cdn.roto.codes/images/nyan-cat.gif" alt="Loading..." />
      </div>
    `;

    $loading.style.display = this.state ? "block" : "none";
  };

  this.render();
}
이미지 모달 닫기
- ESC 누르면 이미지 모달 닫히게 하기
KeyboardEvent.key - Web API | MDN
KeyboardEvent 인터페이스의 읽기 전용 속성인 key 는 키보드 로케일과 레이아웃뿐만 아니라 Shift와 같은 보조 키의 상태까지 고려하여, 사용자가 누른 키의 값을 반환합니다.
developer.mozilla.org
window.addEventListener("keyup", (e) => {
// 만약 누른 키가 esc인 경우 onClose 호출
if (e.key === "Escape") {
onClose();
}
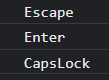
});키보드 이벤트 인터페이스의 읽기 전용 속성인 key는 사용자가 누른 키의 값을 반환한다.
e.key를 콘솔에 찍어보면 다음과 같이 문자열 값이 반환된다.
- 이미지 모달 바깥쪽 클릭시 모달 닫히게 하기
export default function ImageViewer({ $target, onClose }) {
  const $imageViewer = document.createElement("div");
  $imageViewer.className = "ImageViewer Modal";
  ...
  $imageViewer.addEventListener("click", (e) => {
    if (Array.from(e.target.classList).includes("Modal")) {
      onClose();
    }
  });
}
console.log(Array.from(e.target.classList))코드를 추가하고 차례대로 이미지 바깥의 회색 부분을 클릭한 결과와 이미지를 클릭한 결과이다.
정리
이번 강의는 새롭다기 보다는 그동안 배운 것을 복습하는 느낌이었다.
마지막에 말씀하신 내용이 가장 중요한 내용인 것 같아 아래 정리한다.
- 요구사항을 잘 보고 어떤 컴포넌트들을 만들고 조합할지 한번 정리하고 코드를 작성하는 것이 좋다.
- 컴포넌트끼리 어떻게 유기적으로 동작을 할지 고민하고, 그 컴포넌트끼리 최대한 의존성없이 잘 엮여서 돌아갈 수 있는 구조를 만드는 것이 중요하다.
- App.js에서 전체 state를 가지고 있고 다른 컴포넌트들은 이 state를 내려 받는다. 내려 받은 state의 변화에 따라서 컴포넌트가 변화된다. 이러한 흐름을 잘 이해해야 한다.
- 흘러가는 데이터가 컴포넌트의 상태를 묘사하고, 이 묘사한 상태에 따라서 컴포넌트가 어떻게 바뀐다라는 것을 머릿속에 항상 그리고 있어야 한다.
- 이러한 흐름을 잘 이해하면 컴포넌트 기반의 라이브러리나 프레임워크는 금방 익힐 수 있다.
출처: 프로그래머스 프론트엔드 데브코스
[Day 26] VanillaJS를 통한 자바스크립트 기본 역량 강화 II (3)
'데브코스' 카테고리의 다른 글
| [Day 28] TodoList Drag&Drop (0) | 2022.11.23 |
|---|---|
| [Day 27] 고양이 사진 검색기 만들기 (0) | 2022.11.22 |
| [Day 25] 무한 스크롤 구현하기 (0) | 2022.11.21 |
| [Day 24] 프로젝트 배포 (0) | 2022.11.17 |
| [Day 16] 디바운싱, 커스텀 이벤트 (0) | 2022.11.09 |